Essential Recurve Archery Equipment and Accessories
Recurve Archery Equipment: Choosing the Right Gear
Choosing the right recurve archery equipment can initially feel daunting, but it's also an exciting part of your journey into this rewarding sport. As a coach and archer with over 20 years of experience in archery, I’ve seen how crucial selecting appropriate gear is—not only for improving technique but also for maintaining motivation and enjoyment.
Every piece of equipment, from your bow and arrows to finger protection and stabilisers, plays a critical role in how quickly you learn and how confidently you perform. Good gear doesn't always mean the most expensive; rather, it means the right fit for your skill level, body type, and personal goals.
In this comprehensive guide, we'll break down exactly what equipment you need, how to select gear tailored to your experience level and answer common questions new archers frequently ask. By the end, you'll feel confident about your choices and ready to step onto the range, knowing you’ve got the right tools in hand.
Let's dive into the essentials of recurve archery gear and make sure you start your archery adventure on the best footing possible.
Core Recurve Archery Equipment: What You Need to Start
Starting out in recurve archery doesn’t require every accessory under the sun—just the essentials to get you safely and comfortably shooting. Here's a quick overview of the basic gear every beginner should consider:
- Bow (Riser + Limbs): Your bow is the heart of your setup. Beginners often benefit from a takedown recurve bow, allowing you to upgrade limbs as your strength and skill grow.
- Arrows: Properly matched arrows improve accuracy and consistency. Material, spine, and length matter greatly and should be chosen based on your bow’s specifications and your personal measurements.
- String: Essential for transferring energy to your arrow. It's good practice to have at least one spare string.
- Finger Tab or Glove: Protects your fingers from soreness and enhances your release. Tabs are usually more precise, but gloves offer comfort and ease of use for beginners.
- Arm Guard: Prevents painful string slaps and keeps your sleeve away from the bowstring, aiding smoother shots.
- Quiver: Keeps arrows organised, safe, and easy to access while shooting.
- Sight (optional for beginners): A simple sight can significantly boost your accuracy as a new archer, helping you quickly build confidence and consistency.
Beginner Gear Checklist:
- Takedown recurve bow (with appropriately weighted limbs)
- Matched arrows (proper spine and length)
- String (plus spare)
- Finger tab or glove
- Arm guard
- Quiver
- Optional beginner sight
With these essentials, you're ready to start your archery journey on a solid foundation. Next, we'll explore how to select each piece specifically for your needs.
Choosing the Right Recurve Bow
Selecting the right recurve bow is critical to your comfort, accuracy, and enjoyment. Here’s how to make the best choice for your individual needs:
How to Size a Recurve Bow for Your Height and Draw Length
The right bow length is typically determined by your draw length, which is related to your arm span. Measure your arm span (fingertip to fingertip) and divide by 2.5 to estimate your draw length.
Tip: A draw length indicator/arrow is the most accurate method.
Generally:
- Shorter archers (under 5’6”): 62–64 inches bow
- Average height (5’6”–6’): 66–68 inches bow
- Taller archers (over 6’): 68–70 inches bow
Exceptions: People come in all shapes and sizes, and archery equipment manufacturers do their best to accommodate this. Risers come in three lengths; short 23", medium 25" and long 27", as do recurve bow limbs (S/M/L).
This means there is much scope for variance in bow setup to suit the individual, including extra-long and extra-short recurve bows. However, for the purposes of this page, I will assume three bow sizes only (66"/68"/70") and will expand on the topic in another article.
Understanding Draw Weight
Draw weight refers to how much force you need to pull back your bowstring fully. Beginners often start between 20–30 pounds. Too high a draw weight leads to fatigue and poor technique, while too low won’t effectively develop strength.
While it is true that a certain poundage will be required to shoot longer distances (depending on the arrow), many people enjoy the sport with relatively light draw weights and seldom shoot beyond 60 yards.
Takedown vs One-Piece Bows
- Takedown bows allow you to change limbs as you progress and offer portability.
- One-piece bows are generally lighter and simpler but don’t offer the flexibility of upgrades.
Best Recurve Bows for Beginners (and Budget Picks)
- Entry-level (affordable): Samick Sage, Southwest Archery Spyder
- Mid-range (great for serious beginners): Hoyt Xakt, WNS Explore
- Premium (long-term investment): Win & Win Black Wolf, Hoyt Formula Xi
Choosing wisely at the start makes a significant difference in your archery development. Next, we’ll cover how to select the perfect arrows.
How to Choose Arrows for a Recurve Bow
Selecting the correct arrows for your recurve bow is essential for consistent performance and improved accuracy. Here’s what you need to know:
Arrow Spine, Length, and Material
- Spine: Refers to the stiffness of an arrow. Correct spine matches your bow’s draw weight and draw length.
- Length: Should be approximately 1–2 inches longer than your draw length for safety and comfort.
- Material: Common options include aluminium (affordable, durable), carbon (lightweight, consistent), and aluminium-carbon hybrids (balanced, precise).
Using an Arrow Spine Chart
Arrow spine charts help you select the appropriate arrow based on draw length and draw weight. Manufacturers provide charts, making selection straightforward.
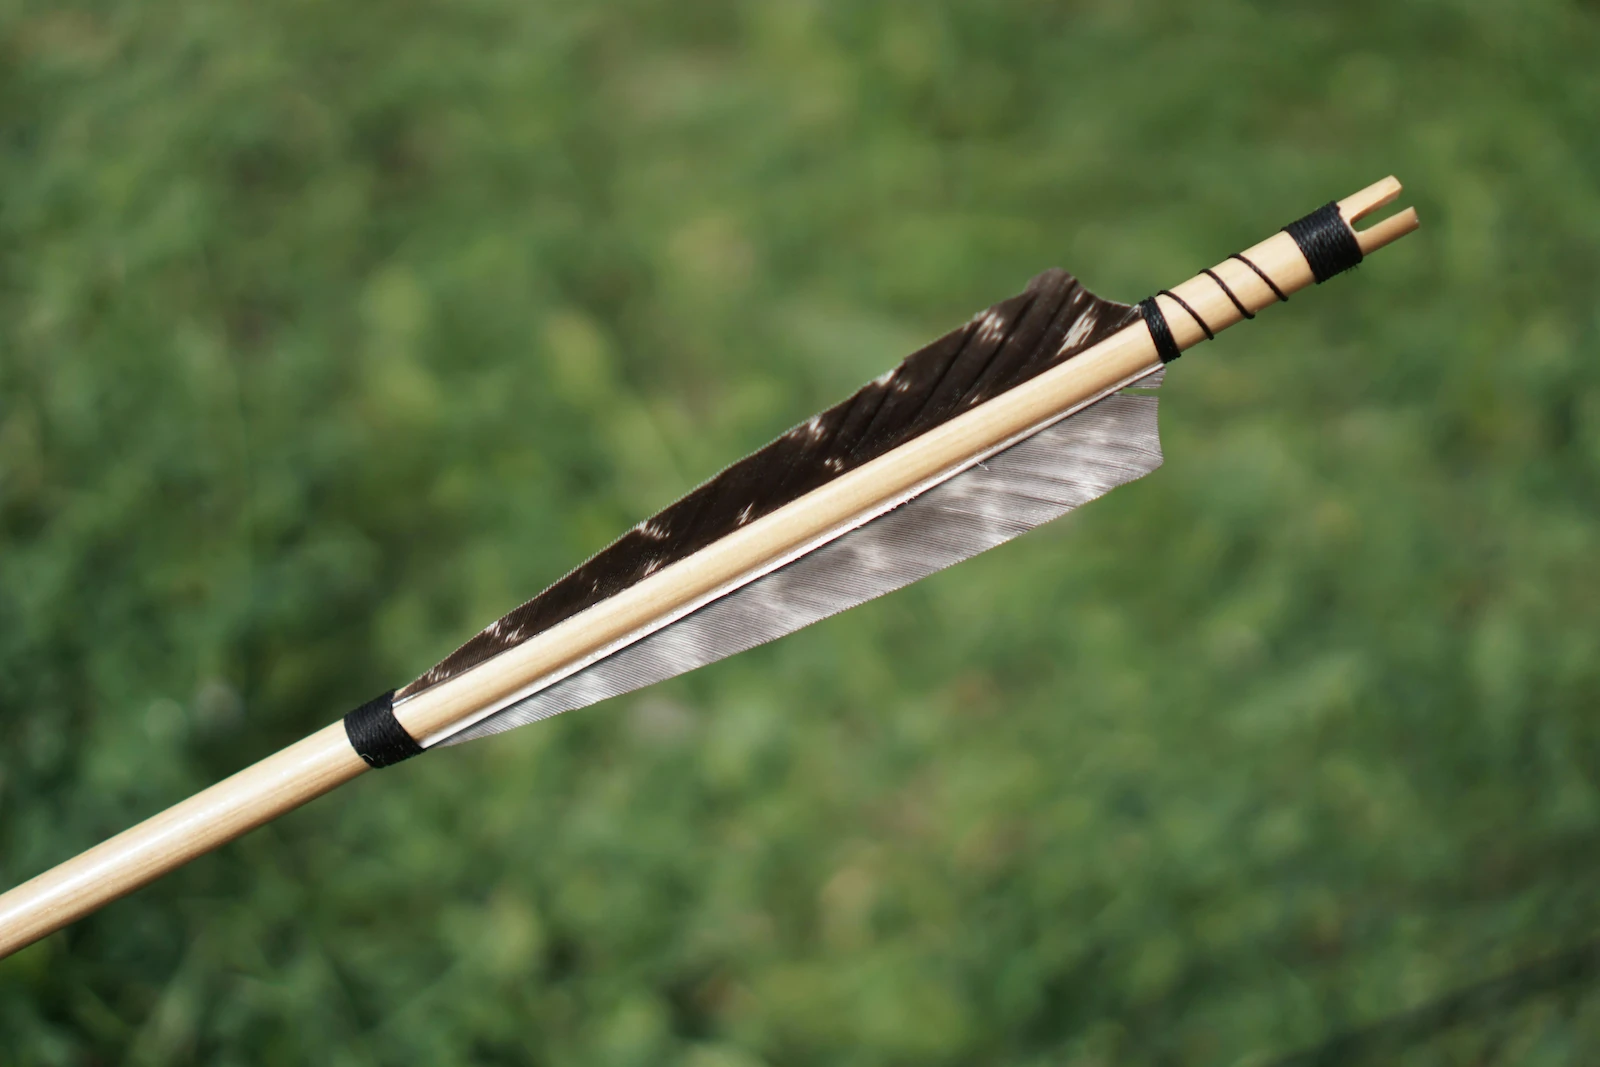
Feathers vs Vanes
- Feathers: Provide more stability and forgiveness but are less durable and sensitive to moisture.
- Vanes: Durable, weather-resistant, and preferred for outdoor or humid conditions.
Common Arrow Mistakes to Avoid
- Choosing arrows too stiff or weak for your bow.
- Incorrect arrow length causing inconsistent accuracy or safety hazards.
- Mismatching arrows to your intended style (target, field, or hunting).
Armed with the right knowledge, your arrows will enhance your shooting experience dramatically. Next, we’ll explore archery sights and whether they’re right for you.
Archery Sights: Are They Worth It?
Archery sights can dramatically improve accuracy, especially for beginners learning proper form and aiming technique. But are they right for everyone? Here's what you need to know:
Should Beginners Use a Sight?
Absolutely—beginners greatly benefit from sights because they aid accuracy and accelerate skill development. A sight helps new archers develop consistent form by providing a clear aiming point.
Fixed vs Adjustable Sights
- Fixed sights: Simple, affordable, and ideal for beginners. They're less adjustable but effective for consistent target distances.
- Adjustable sights: Offer precision adjustments for various distances. Great for intermediate archers or those progressing toward competitive shooting.
How to Mount and Align a Recurve Sight
Mount your sight securely onto the riser, ensuring it aligns vertically with your string. Initial alignment involves shooting groups of arrows, observing patterns, and adjusting the sight accordingly until consistent accuracy is achieved.
Upgrading Sights as You Improve
As you gain experience, upgrading to a higher-quality adjustable sight allows for more precise tuning and consistency over varying distances—essential for intermediate and competitive archers.
Stabilisers: What They Do and When to Use Them
Adding stabilisers to your recurve bow setup can significantly enhance your performance, especially as your archery skills develop. But what exactly do stabilisers do, and when should you consider using them?
What Does a Stabiliser Do on a Recurve Bow?
A stabiliser improves your bow's balance, absorbs vibration, and reduces unwanted bow movement during and after release. This leads to steadier aiming, improved accuracy, and less fatigue during practice and competition.
Types of Stabilisers Explained:
- Long Rod (Main Stabiliser): Extends from the front of the bow, helping to stabilise your aim and reduce bow torque.
- Side Rods: Shorter stabilisers placed to the side or rear, aiding balance and reducing sideways bow movement.
- Dampers: Small components attached to stabilisers, absorbing vibration and reducing noise.
When Should You Add Stabilisers to Your Setup?
- Beginners typically start without stabilisers to focus first on fundamental form and technique.
- Consider adding a basic long rod stabiliser once you’re consistently hitting your target and want to improve precision.
- More advanced setups with side rods and dampers become beneficial as you approach intermediate or competitive levels.
By strategically adding stabilisers, you’ll see noticeable improvements in your consistency and performance.
Finger Tabs, Gloves, and Protection Gear
Finger protection might seem like a small detail, but it greatly impacts your comfort, consistency, and overall archery experience. Here’s what you need to consider when choosing your finger protection and arm guards:
Finger Tab vs Glove: Which Is Better for Beginners?
- Finger Tabs: Offer a cleaner, more precise release, and are generally preferred by competitive archers. They're ideal for developing consistent form right from the start.
- Gloves: Provide comfort and ease of use, making them great for casual or recreational archers, though they can be slightly less precise than tabs.
For beginners, a quality finger tab is often recommended as it encourages proper technique from the beginning.
Choosing a Well-Fitted Tab or Glove
- Ensure the tab or glove fits snugly without being overly tight.
- The protective surface should fully cover your fingers without excess bulk.
- Look for adjustable tabs or gloves to customise fit as you progress.
Purpose of the Arm Guard (and Why It’s Not Optional)
An arm guard protects your forearm from painful string slaps and prevents clothing from interfering with your bowstring. Even experienced archers use them regularly, as accidental string hits are common—especially when adjusting form or technique.
Warning: "It's OK. I don't need an arm guard... *TWANG* Ow!! That hurts!"
Common Fitting Mistakes
- Choosing protection gear that is too loose or bulky, hindering proper release.
- Not covering enough finger surface area, leading to discomfort and poor form.
- Ignoring the importance of an arm guard and experiencing unnecessary discomfort.
Selecting comfortable, correctly fitted protection gear ensures your practice stays enjoyable, safe, and productive.
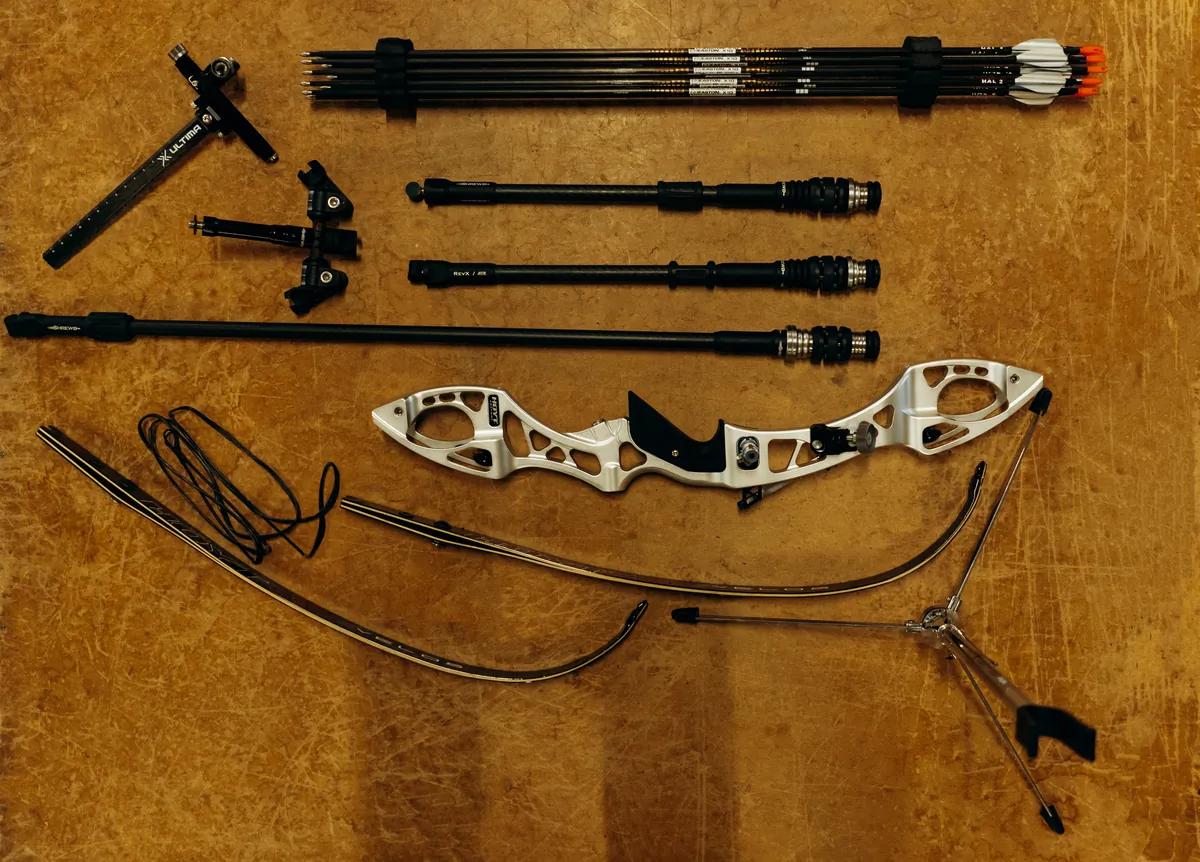
Useful Accessories to Consider
Beyond the essential gear, several accessories can enhance your shooting experience, improve your convenience, and help maintain your equipment. Here’s a practical overview of useful extras worth considering as you grow in the sport:
Bow Stand
- A simple bow stand helps protect your bow by keeping it safely upright and clean between shots or when resting at the range.
Bow Stringer
- A bow stringer safely helps you string and unstring your recurve bow, significantly reducing the risk of bow damage or personal injury compared to manual methods.
Nocking Points & Plunger Buttons
- Nocking points help ensure your arrows consistently align on the bowstring for accurate shooting.
- Plunger buttons aid accuracy by providing adjustable pressure against the arrow, optimising arrow flight.
Spare Strings, String Wax & Maintenance Gear
- Always keep spare bowstrings to prevent lost practice time due to breakage or wear.
- Regularly apply string wax to protect the bowstring and extend its lifespan.
- Basic maintenance kits (Allen keys, limb gauges, and cleaning cloths) help keep your gear in top condition.
Affordable Gear Upgrades Worth Having
- Higher-quality strings for smoother, more consistent shooting.
- Upgraded arrow rests or clickers to enhance consistency in arrow release and positioning.
What You Don’t Need to Buy Yet
- Advanced tuning tools or expensive accessories aimed at high-level competitors. Focus instead on essential upgrades aligned with your current skill level.
Thoughtful accessory choices can significantly elevate your archery experience, making your practice sessions smoother and more enjoyable.
Beginner vs Intermediate: When to Upgrade Gear
As your archery skills improve, you'll inevitably reach a point where your beginner gear may start limiting your performance. Recognising when and how to upgrade can help you continue progressing smoothly without unnecessary expense.
Signs Your Gear Is Holding You Back:
- Your accuracy and consistency plateau despite regular practice.
- You feel discomfort or strain because your bow or arrows no longer match your strength and form.
- Equipment reliability issues, such as regular bowstring breakages or consistently poor arrow flight.
Smart Upgrades That Make a Difference:
- Limbs with higher draw weight: Gradually increasing limb weight will build strength and enhance performance.
- Higher-quality arrows: Investing in matched, precisely spined arrows improves grouping and accuracy.
- Adjustable sights and stabilisers: Allow fine-tuning and improved precision as you begin competing or engaging in longer-distance shooting.
- Better finger tabs and protection gear: Enhanced comfort and cleaner release translate directly into improved consistency.
Avoiding Costly Mistakes When Moving Up:
- Avoid jumping into very high draw weights too quickly—incremental increases (2–4 pounds) are best.
- Don’t overspend on professional-grade gear prematurely; ensure your upgrades match your skill progression.
- Prioritise equipment adjustments based on your most noticeable performance bottlenecks, not trends or aesthetics.
Carefully timed gear upgrades can reignite your enthusiasm and significantly boost your archery development, preparing you for the exciting next phase of your journey.
FAQs About Recurve Archery Equipment
To round off our gear guide, here are answers to some of the most common questions new archers ask when choosing recurve archery equipment.
Q: What equipment do I need to start recurve archery?
At minimum, you’ll need a takedown recurve bow, matched arrows, a string, a finger tab or glove, an arm guard, and a quiver. A basic sight is optional but highly recommended for new archers.
Q: What’s the best recurve bow for a complete beginner?
Popular beginner models include the Samick Sage, Southwest Archery Spyder, and WNS Explore. These bows are reliable, upgradeable, and budget-friendly—ideal for learning proper technique.
Q: How do I choose arrows for my draw length?
Measure your draw length (typically arm span ÷ 2.5), then add 1–2 inches. Match your arrow spine to your bow’s draw weight using a manufacturer’s arrow chart.
Q: Should I use a finger tab or a glove?
Use a finger tab for precision and consistency; it’s the preferred choice for most archers beyond the beginner level. Gloves are comfortable and convenient but slightly less precise.
Q: What does a stabiliser do?
A stabiliser improves balance, reduces vibration, and helps you hold your aim more steadily—especially useful once you’ve developed consistent shooting form.
Q: How much should I spend on beginner gear?
A solid beginner setup typically costs between $200-300 or £150–£300 (2025 prices). Focus on fit and function rather than brand or price. Many components can be upgraded later without replacing your entire setup.
Q: What accessories are useful but not essential?
A bow stand, stringer, spare strings, string wax, and maintenance tools are excellent to have but not critical for your first sessions. Add them gradually as you settle into the sport.
Conclusion & Final Gear Checklist
Choosing the right recurve archery equipment doesn’t need to be overwhelming. With the right guidance and a step-by-step approach, you can build a setup that supports your growth, fits your body, and enhances your enjoyment of the sport.
Whether you're just picking up a bow for the first time or returning to archery after a break, remember: your gear should serve you, not frustrate you. Start simple, prioritise fit and function, and upgrade gradually as your skills and ambitions grow.
Here’s a final summary to help you assemble your ideal beginner kit:
✅ Recurve Archery Beginner Gear Checklist
- Takedown recurve bow (sized for your draw length and strength)
- Limbs with appropriate draw weight (typically 20–30 lbs to start)
- Matched arrows (correct spine and length)
- Bowstring (plus one spare)
- Finger tab or glove (well fitted)
- Arm guard
- Ground or hip quiver
- Basic bow sight (optional but recommended)
- Bow stringer
- String wax
- Bow stand (optional but handy)
- Nocking point installed on string
- Simple maintenance kit (Allen keys, cloth, spare parts)